A methodical approach to upgrading a plumbing system begins with a thorough assessment of supply lines, fixtures, water heater, drainage, materials, and potential leaks. Document findings with clear photos and notes. Prioritize high-impact, low-cost fixes that prevent disasters and improve reliability, then plan a phased budget-friendly strategy. Consider efficient fixtures and water-saving tech, verify flow rates, and confirm proper venting and access. Decide DIY versus professional help wisely and vet installers to protect warranties, and proceed with meticulous documentation as a guide for the next steps.
How to Assess Your Current Plumbing System
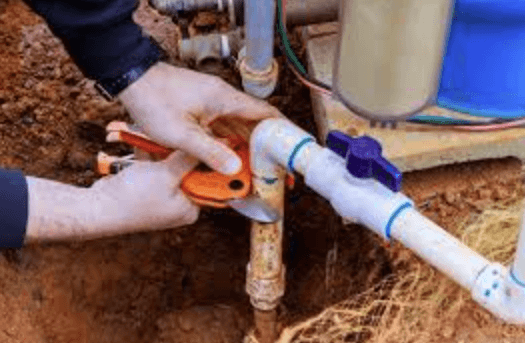
To assess a home’s plumbing system, start with a systematic inventory of visible components and documentation: identify supply lines, fixtures, water heater, and drainage paths, noting pipe materials, ages, and any signs of leakage or corrosion. The evaluator documents identifying leaks and assessing pipe material, records locations, and captures photographs. This method emphasizes safety, clarity, and deliberate, freedom-loving, procedural analysis.
Prioritize Fixes That Save Money and Prevent Disasters
From the inventory and documentation established in the previous assessment, focus shifts to prioritizing fixes that conserve resources and avert failures.
The process emphasizes budget planning, identifying high-impact, low-cost repairs, and scheduling them to maximize safety and reliability.
Emphasize preventive steps that reduce longer-term expenditures and emergency calls, aligning actions with disaster prevention and responsible resource stewardship for informed, autonomous homeowners.
Upgrading Fixtures and Water-Saving Technologies
Upgrading fixtures and incorporating water-saving technologies begins with a clear assessment of current demands, installations, and potential efficiency gains.
Next, select eco friendly fixtures and compatible water saving technologies, prioritizing reliability, code compliance, and installation safety.
Plan phased replacements, verify flow rates, and calibrate meters.
Document specifications, test performance, and ensure proper venting, shutoffs, and access for future maintenance.
See also: The Rise of OTT Platforms
DIY vs. Pro: When to Hire Help and How to Vet Pros
When deciding between do-it-yourself work and hiring a professional, readers should assess project complexity, safety risks, and local code requirements before proceeding.
A careful vetting process follows: compare credentials, insurance, and references; verify licensing checks where required; request written estimates and scope; document warranties; recognize DIY pitfalls such as hidden issues and improper venting; prioritize safety, compliance, and reliability.
Conclusion
A prudent upgrade follows a methodical plan: assess existing lines, fixtures, and water heaters; document with photos; and flag high-risk issues. Prioritize low-cost, high-impact fixes that prevent disasters while aligning with budget. Select efficient fixtures and verify flow and venting. Decide DIY vs. pro based on skill and safety, vet contractors, and protect warranties. Proceed in phases, maintaining clear records. In the end, this approach keeps systems reliable and running smoothly, avoiding pitfalls and staying ahead of trouble before it strikes. (once in a blue moon)